Main area
1
2
Main area 1 / 12
  • L1, R2, L3, R4, M4 (FA: Pete Balint) Harder without the crafty heel-hook to start next to the left undercling L1.
  • L5, R6, R7, R8, L7, R9, M9, L10, M10 (FA: Rob LeBreton). Harder if you only use L5 as an undercling (ie. not a pinch).
Main area
1
2
Main area 2 / 12
Main area
1
2
3
Main area 3 / 12
  • V10 - L0, R3, L4, R5, M5 (FA: Pete Balint) A phenomenally dynamic problem that is waiting for the "matched" start.
  • M1, R2, L3, M3, R4, L5, M5 (FA: Tim O'Neill) Superb problem using all the tricks in the book but it is usually wet
  • M6, R7, M7, R8, L9, M9 (Chin-up Bar) Burly start to pleasant finish.
Main area
1
Main area 4 / 12
Main area
1
2
Main area 5 / 12
  • M1, L2, R3, L4, M4 (continue to 7 if you dare!) Good warm-up for the fingers and back.
  • M5, L6, R7, M7 (FA: Big John) You'll get used to watching your hand slide off the last hold!
Main area
1
2
Main area 6 / 12
Main area
1
2
Main area 7 / 12
  • M1, R2, L3, R4, L5, M5, R6, M6 Start low and left with your right in the 3/4 finger pocket and lunge for the first hold.
  • L7, R8, R9, M9, R10, M10, R11, L12, M12 Classic powerful problem.
Main area
1
2
3
4
Main area 8 / 12
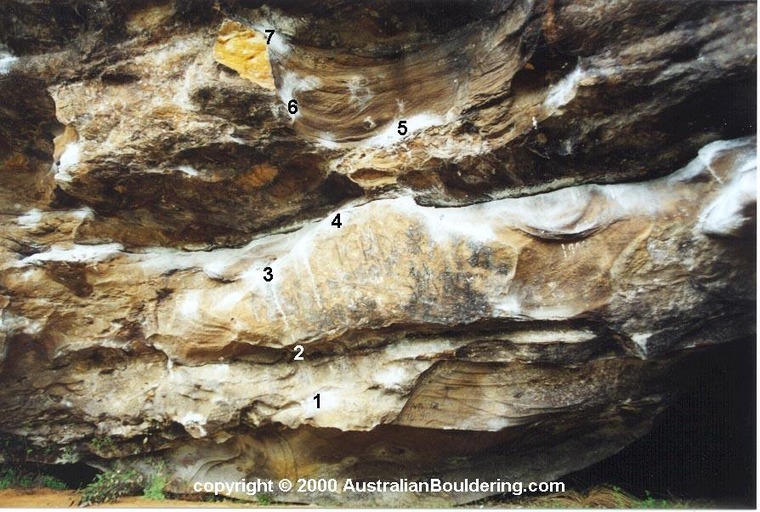
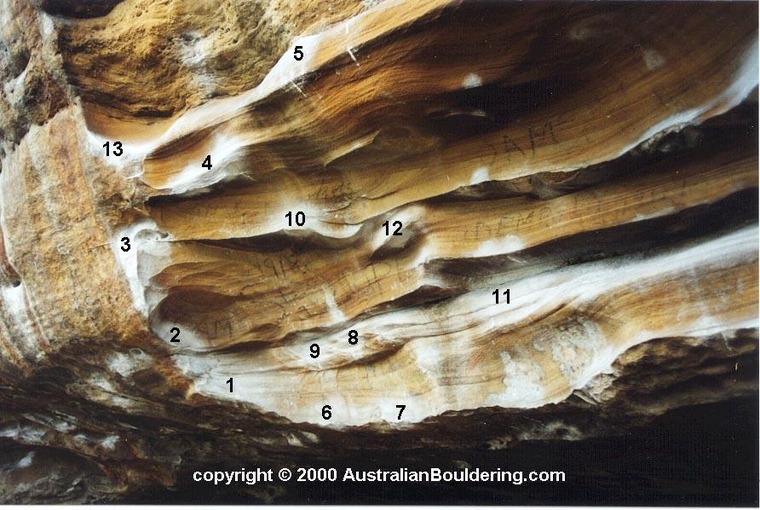
  • M1, R2, M2, R3, M3, R4, M4, R5, M5 Everyone falls off the last slap move.
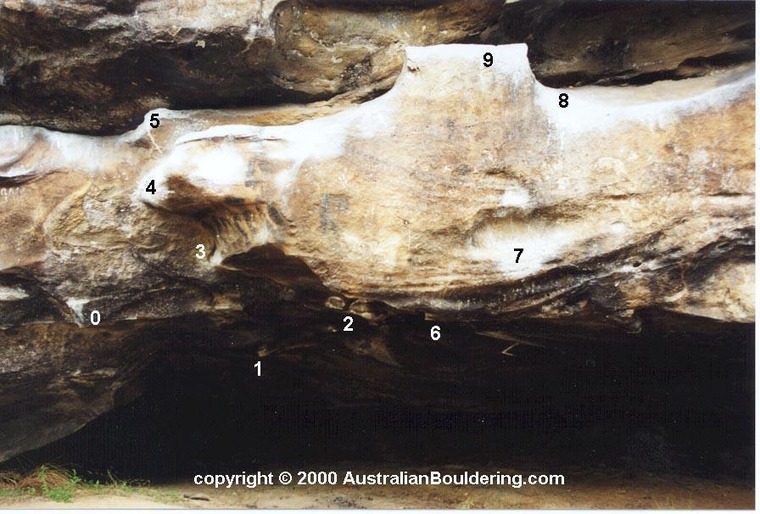
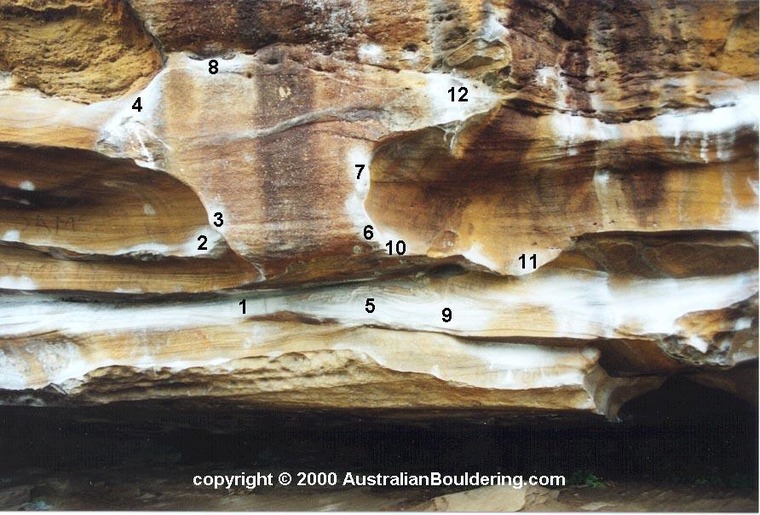
  • L6, R7, R8, L9, R10, L4, R5, M5 (FA: Rob LeBreton) Holds are getting smaller and smaller ...
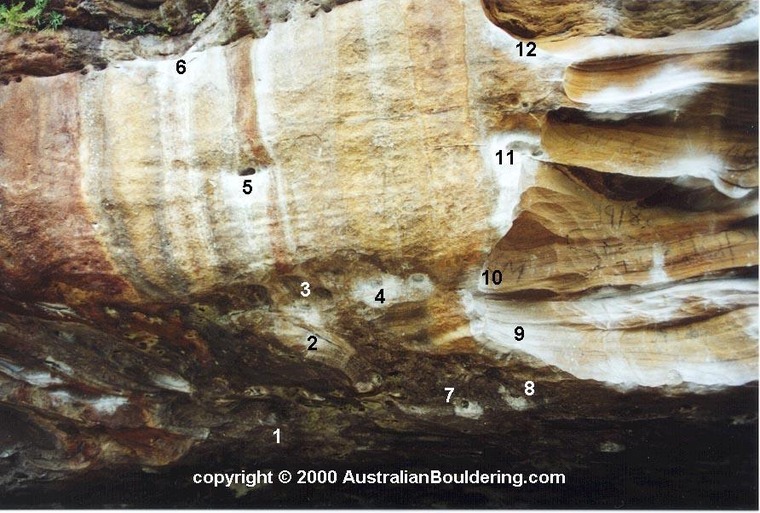
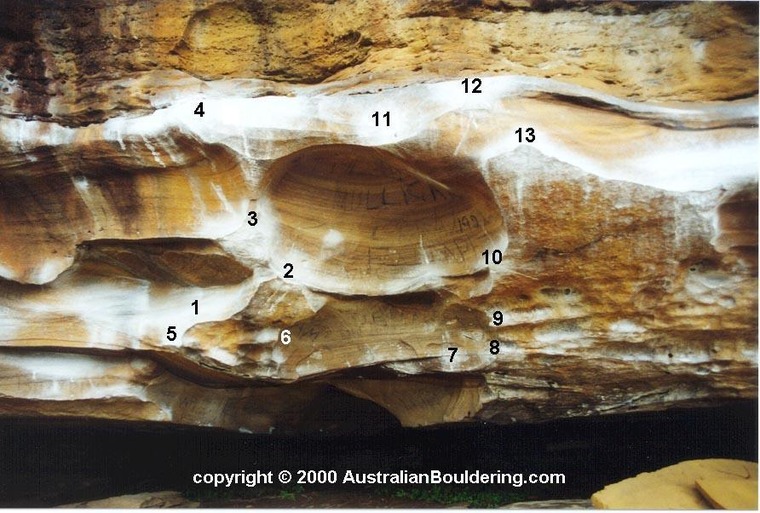
  • M11, L12, L10, R4, L13, M13 (FA: Pete Balint) Footwork is the key to this one.
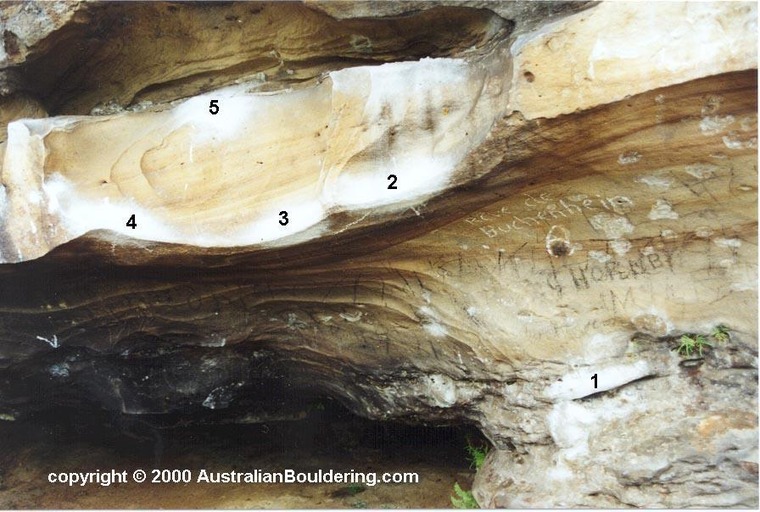
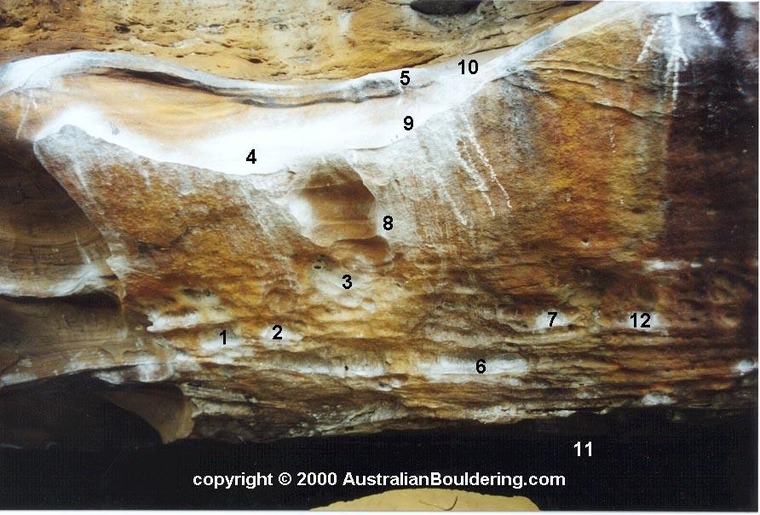
  • Sit start to Travis. Start on 2 underclings.
Main area
1
2
3
4
Main area 9 / 12
Main area
1
2
3
4
Main area 10 / 12
Main area
1
2
3
Main area 11 / 12
Main area
1
2
3
Main area 12 / 12